Technicolor TG582n IPv6 for Forthnet

So, after a long time of zero blog posting activity I thought it would be nice to share my ADSL modem/router configuration for IPv6 connectivity with my current ISP, Forthnet.

The ADSL router I use is a Forthnet provided Technicolor TG582n. TG582n’s firmware revision is at *10.2.2.B.EH*. I am already aware of my provider’s IPv6 settings so that really helped me a lot with the evaluation of my setup. For more information regarding Forthnet’s IPv6 setup status and/or settings you can refer to it’s official website. According to the site, Forthnet has currently configured almost all of its ADSL BRAS Routers so you don’t have to alter your PPP username to have IPv6 up and working.

Anyway, let me guide you through my TG582n configuration which works in perfect harmony with Forthnet’s IPv6 settings.

First, login into the CLI of the modem/router. As usual, TG582n’s default IP address is 192.168.1.254.

telnet 192.168.1.254

Enable ipv6 on the Internet ppp interface

:ppp ifdetach intf Internet :ppp ifconfig ipv6 enabled intf Internet :ppp attach intf Internet

Re-configure the IPv6 DHCP Client of the modem/router to work correctly with Forthnet’s IPv6 routers.

:dhcp clientv6 ifdetach intf=Internet :dhcp clientv6 ifconfig intf Internet listenra disabled :dhcp clientv6 ifattach intf=Internet

You will know if everything worked correctly when you receive your /56 IPv6 Prefix. You can check it with the following command

:dhcp clientv6 iflist expand enabled

See an output example bellow:

DHCPv6 Client Info :
Interface : Internet
Mode : stateful
DHCPv6 Client State : [BOUND]
Client DUID :
Non Temporary Adress list :
Prefix list :
IA ID :
Renew value : 0 days, 12:00:00
Rebind value : 0 days, 19:12:00
Prefix : ::/56 [active]
Preferred lifetime : 1 day, 0:00:00
Valid lifetime : 7 days, 0:00:00

Timeout till depreferred : 0 days, 18:41:58

Configure modem/router’s IPv6 DHCP Server in order to pass out correct DNS options on your local LAN

:dhcp serverv6 config state=enabled
:dhcp serverv6 option add name=forthnet_dns
:dhcp serverv6 option fieldadd name=forthnet_dns option=domain-name-servers value=2a02:2148:99:8888::8888
:dhcp serverv6 option add name=google_dns
:dhcp serverv6 option fieldadd name=google_dns option=domain-name-servers value=2001:4860:4860::8888
:dhcp serverv6 pool optionadd name=LAN6_pool optionname=forthnet_dns
:dhcp serverv6 pool optionadd name=LAN6_pool optionname=google_dns

That would be all!

You can now enable the IPv6 settings on one of your local workstations and check if everything is working correctly. Forthnet has an IPv6 testing website to check from your web browser: http://test-ipv6.forthnet.gr/

Have fun with your IPv6 Home setup! 🙂
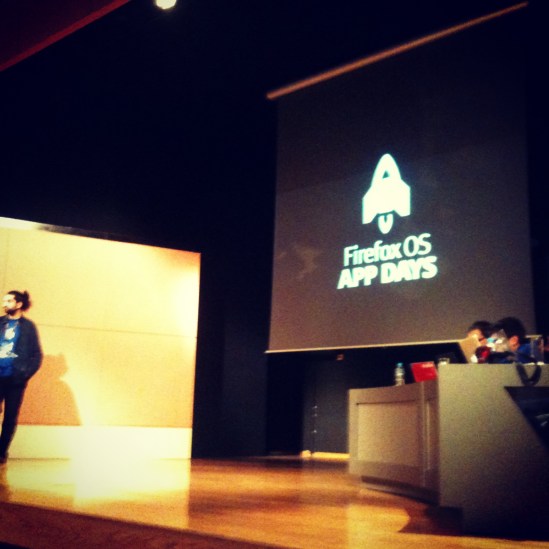
Mozilla Firefox OS App Days in Greece


As scheduled by Mozilla
, on 26/01/2012 Firefox OS was showcased worldwide receiving quite possitive feedback. Athens, Greece was one of the cities to be in the list so an all day event took place under the supervision and great care of people involved directly or indirectly with the project itself. With help from @ppapadeas, @comzeradd, @bacharakis and many other members of Mozilla’s Greek Community (@MozillaGreece) as well as Greek FOSS supporters, we experienced the new mobile operating system in full action!

The event started early in the morning with an overall description of Firefox OS’s features and strenghts. An OS running on rock solid and well tested technologies such as HTML5, CSS3 and Javascript is here to offer a practically transparent platform for your Web Apps to run natively on any supported mobile device. Best part? Mozilla provides free tools for all developers to create, test, publish and even monetize from their mobile applications through the Firefox Marketplace.

After the initial session, a “Create your Own Firefox OS Web App” hackathon started with almost all the participants taking place. Everyone got their hands on Firefox OS Simulator -try it with the latest Firefox browser, very slick add-on for developers- and tested the product. During the hackathon and almost every hour, lightning talks were taking place covering more advanced concepts of mobile application development such as responsive UI, Git code versioning and best of all, flashing existing Android devices with Mozilla’s new Firefox OS!

The event ended with a presentation of all mobile applications created throughout the hackathon. Each project received a Firefox OS Phone for Developers, a nice gift from Geeksphone. Geeksphone is soon launching 2 different flavors of Firefox OS Dev Phones in the market and the devices will be built according to the new OS’s features and needs.

Firefox OS App Days

Check #FirefoxOSAppDays and follow @MozillaGreece on Twitter to receive the latest updates.


UDP / TCP Checksum errors from tcpdump & NIC Hardware Offloading

If you’ve ever tried to trace a UDP or TCP stream by using the tcpdump tool on Linux then you may have noticed that all, or at least most, packets indicate checksum errors. This is caused because you have checksum offloading on your network card (NIC) and tcpdump reads IP packets from the Linux kernel right before the actual checksum takes place in the NIC’s chipset. That’s why you only see errors in tcpdump and your network traffic works ok.

So, just to proove my point, here is a tcpdump output while monitoring DNS traffic (udp/53)


$ sudo tcpdump -i eth0 -vvv -nn udp dst port 53

tcpdump: listening on eth0, link-type EN10MB (Ethernet), capture size 65535 bytes
17:04:48.145904 IP (tos 0x0, ttl 64, id 0, offset 0, flags [DF], proto UDP (17), length 61)
10.0.0.2.56497 > 10.0.0.1.53: [bad udp cksum 0x8f54 -> 0xb8fc!] 30234+ AAAA? www.twitter.com. (33)
17:04:48.145925 IP (tos 0x0, ttl 64, id 0, offset 0, flags [DF], proto UDP (17), length 61)
10.0.0.2.56497 > 10.0.0.1.53: [bad udp cksum 0x224d -> 0x2604!] 30234+ AAAA? www.twitter.com. (33)

After checking active NIC hardware offloading options you can see the obvious


$ sudo ethtool -k eth0 | grep on
rx-checksumming: on
tx-checksumming: on
scatter-gather: on
generic-segmentation-offload: on
generic-receive-offload: on
rx-vlan-offload: on
tx-vlan-offload: on

After disabling TCO (tcp offloading) for TX/RX on the NIC the problem is gone


$ sudo ethtool -K eth0 tx off rx off


$ sudo tcpdump -i eth0 -vvv -nn udp dst port 53

tcpdump: listening on eth0, link-type EN10MB (Ethernet), capture size 65535 bytes
17:06:09.355411 IP (tos 0x0, ttl 64, id 0, offset 0, flags [DF], proto UDP (17), length 57)
10.0.0.2.18964 > 10.0.0.1.53: [udp sum ok] 292+ AAAA? twitter.com. (29)
17:06:09.355431 IP (tos 0x0, ttl 64, id 0, offset 0, flags [DF], proto UDP (17), length 57)
10.0.0.2.18964 > 10.0.0.1.53: [udp sum ok] 292+ AAAA? twitter.com. (29)

For the sake of performance, remember to turn TCO back on after each tcpdump execution. 😉

If you saved the tcpdump output and later you need to correct the bad checksums then you can do one of the following:


$ sudo tcpreplay -i eth0 -F -w output.cap input.cap

or


$ sudo tcprewrite -i input.cap -o output.cap -C

Edit:
In this excellent article you can see the whole process illustrated as well as the impact of Generic Segmentation Offloading during packet capture.

Ubuntu Precise 12.04: Get rid of NM’s dnsmasq and setup your own!

Anyone from an older version with a working dnsmasq setup must have noticed that after a dist-upgrade to Ubuntu Precise 12.04 dnsmasq is having trouble on startup. The reason is simple. On the upcoming 12.04 Desktop release, Network Manager is starting its own dnsmasq instance which is binded on the localhost ip (127.0.0.1) and is responsible for making sure all LAN, WAN or even VPN connections have a proper DNS handling from a routing prespective. No caching at all! For more info on that change read this blog post.

As already described, NM’s dnsmasq instance listens on localhost. With a little help from the resolvconf package (this is also new to 12.04 Desktop), the /etc/recolv.conf file will look like this.


# Dynamic resolv.conf(5) file for glibc resolver(3) generated by resolvconf(8)
# DO NOT EDIT THIS FILE BY HAND -- YOUR CHANGES WILL BE OVERWRITTEN
nameserver 127.0.0.1

The previous resolv.conf entry means that all DNS requests from your Desktop will be headed to the local dnsmasq instance started by the Network Manager.

If you are a power user and you want your dnsmasq custom configuration to be NM dependent all you have to do is comment out the “dns=dnsmasq” parameter in the Network Manager’s configuration


sudo vi /etc/NetworkManager/NetworkManager.conf

and restart the NM service


sudo restart network-manager

After that, try to restart your previously configured dnsmasq and see the results. Everything is in place now!

  1. /etc/resolv.conf is no longer dependant on resolvconf package and is updated based on the DNS entries of each connection in the Network Manager
  2. dnsmasq can not bind freely on the localhost (127.0.0.1:53)

Last but not least, here are some dnsmasq configuration parameters I found helpful until now.
You should use them in “/etc/dnsmasq.conf” (remember to edit it as root with sudo).


# Listen only on localhost
listen-address=127.0.0.1
bind-interfaces

# The default is 1000 dns entries to be cached.
cache-size=10000

# Make sure that DNS requests going out contain a valid domain
domain-needed

# The resolv file which dnsmasq will check for its default nameservers
# The syntax for that file is the same as for classic resolv.conf
resolv-file=/etc/resolv.dnsmasq

# Do not try to check the default /etc/resolv.conf file for any reason
no-poll

# All DNS requests for domain.prive, its subdomains and the reverse maps
# should be sent to the proper DNS. Adjust to your environment.
server=/domain.prive/10.0.0.1
server=/10.in-addr.arpa/10.0.0.1

Restart the dnsmasq service and do some DNS tests to make sure it working as expected


sudo service dnsmasq restart

dig http://www.google.com @127.0.0.1
dig blah.domain.prive @127.0.0.1

If the previous dig results have proven to be ok then edit your Network Manager LAN connections and make sure they have dnsmasq as a primary DNS server. The address is 127.0.0.1.

To monitor dnsmasq’s statistics (cache usage, etc) all you have to do is send the process a USR1 signal and the statistics will be outputed in syslog.


sudo kill -USR1 `pgrep dnsmasq`
sudo less /var/log/syslog

The output should similar to that bellow


Mar 31 18:55:06 pc dnsmasq[16919]: time 1333209306
Mar 31 18:55:06 pc dnsmasq[16919]: cache size 10000, 0/2877 cache insertions re-used unexpired cache entries.
Mar 31 18:55:06 pc dnsmasq[16919]: queries forwarded 1437, queries answered locally 907
Mar 31 18:55:06 pc dnsmasq[16919]: server 194.219.227.2#53: queries sent 0, retried or failed 0
Mar 31 18:55:06 pc dnsmasq[16919]: server 10.32.54.4#53: queries sent 64, retried or failed 32
Mar 31 18:55:06 pc dnsmasq[16919]: server 193.92.3.11#53: queries sent 1118, retried or failed 2
Mar 31 18:55:06 pc dnsmasq[16919]: server 193.92.150.3#53: queries sent 360, retried or failed 0